Cinco de Mayo- Quarantine Style

I’ve been working on something (more like eating ON something) for about a week now, and I’m bringing it to you just in time for Cinco De Mayo- Quarantine Style.

Maybe you don’t usually indulge in tacos and margaritas on the 5th of May, BUT if you do and you’re looking to make some festive food at home, I’ve got some meal recommendations/recipes for you.

As much as I don’t want to, let’s start with DINNER. You have to try Danielle Walker’s Against All Grain Carne Asada bowls. The carne asada turns out so flavorful and tender. If you’re in more of a taco mood, you can certainly make these into tacos. *Make sure you marinade your protein for at least 30 minutes.

If you don’t have the Against All Grain book, you can find the recipe here:

Feeding Friendships, Episode 5: Rebekah Lyons

If you can’t celebrate Cinco De Mayo without a MARGARITA but aren’t feeling a mix that comes out of a jug, try this simple-fruit sweetened recipe.

Skinny Margarita
A little Cinnamon & Sugar sure was NICE.

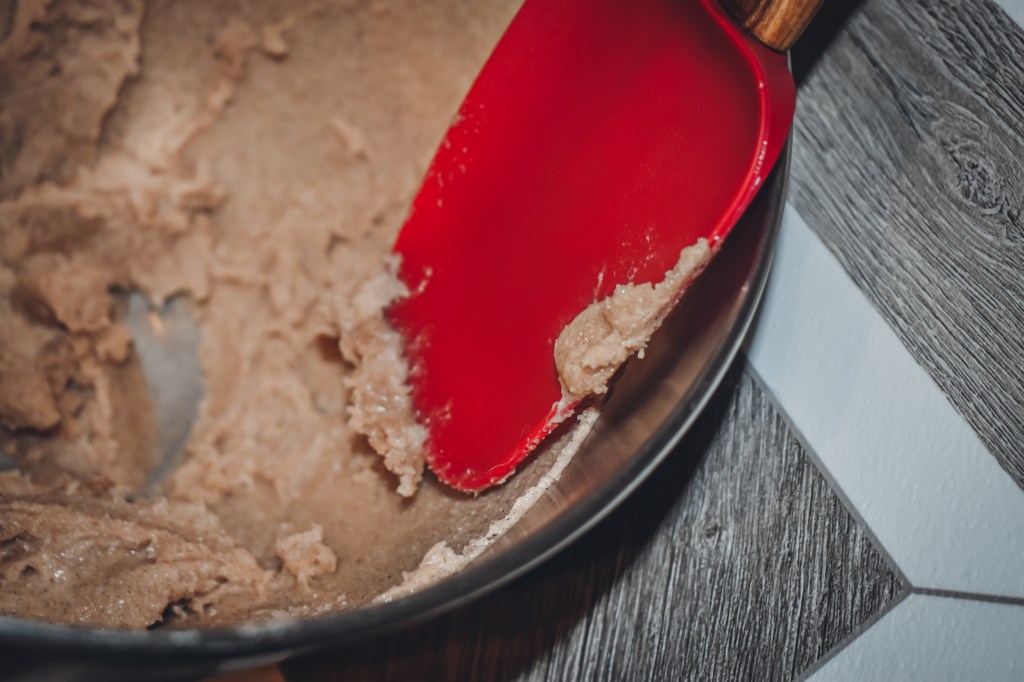
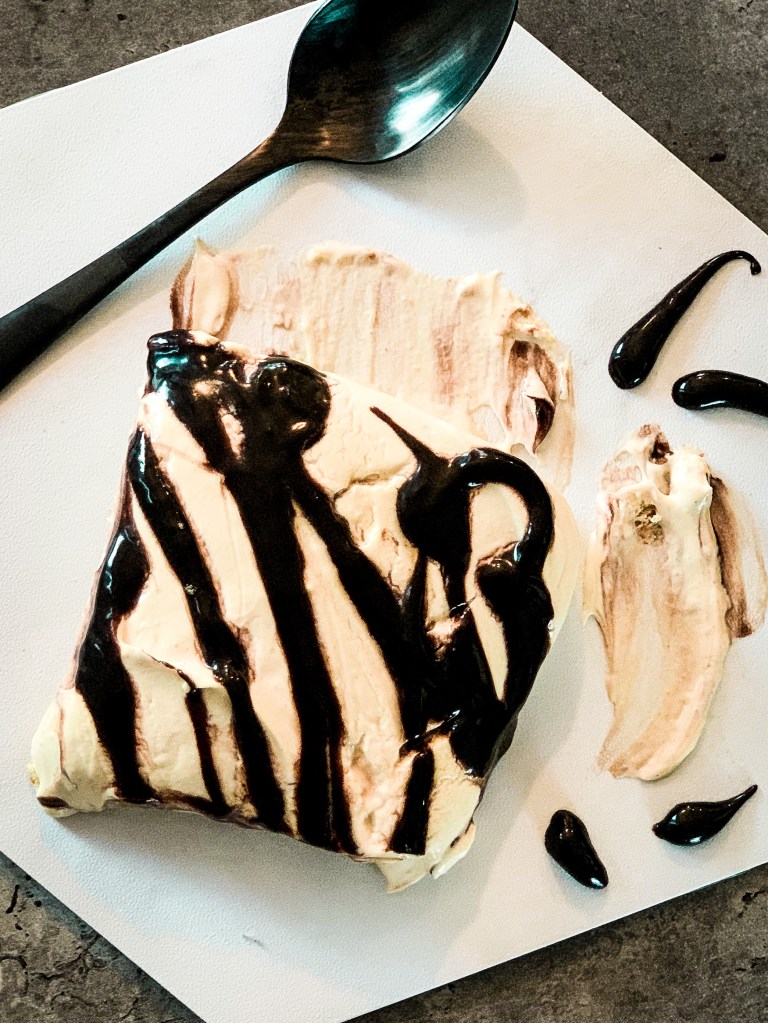
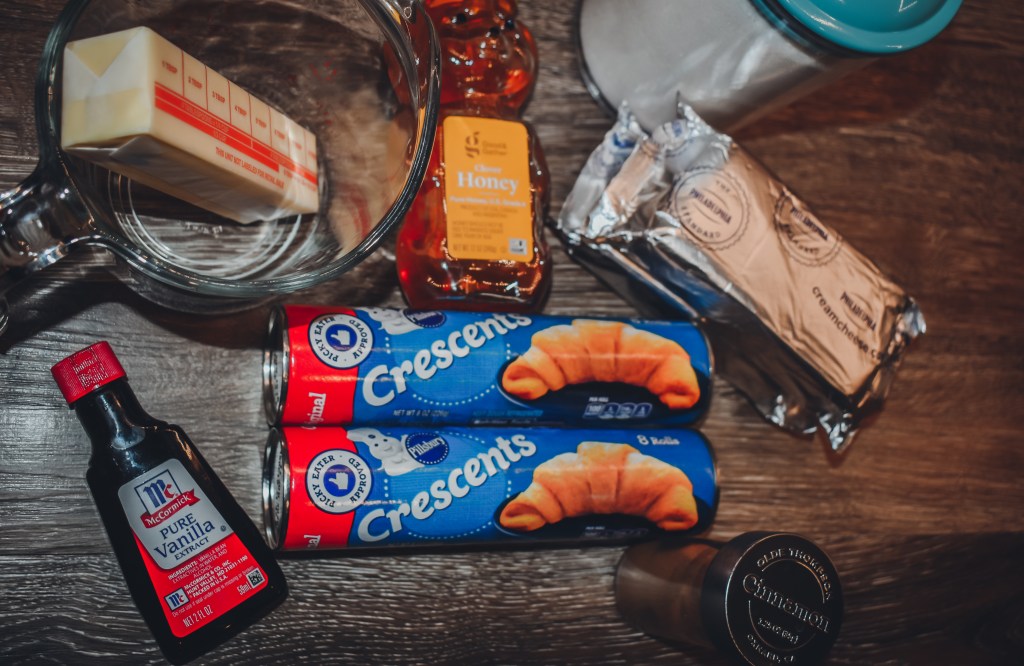
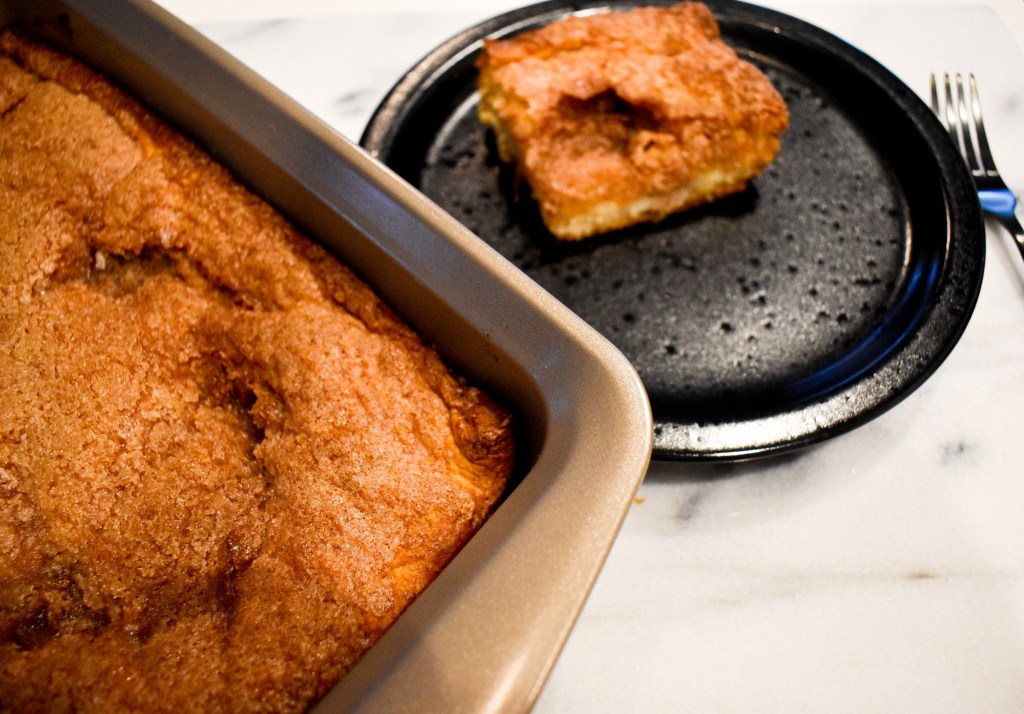
And lastly, the TRUE star of the show in my eyes is this incredibly simple BUT AMAZING twist on a Sopapilla.

If you google “Sopapilla Cheesecake Pie,” you’ll find probably hundreds of recipes that are identically…. so while I thought about sparing you. I’ve decided not to.

Note: Traditional Sopapillas are deep-fried, hollow puff pastries (similar to fry bread) served with honey. Feel free to drizzle some on this dessert, but honestly, you’ll probably be too impatient.

  • You’ll need:
  • 2 (8oz) packages of cream cheese (softened)
  • 2 rolls of Pillsbury crescent rolls
  • 1 Tsp of Vanilla (Mexican if you have it)
  • 1 Tbsp of ground cinnamon
  • 1 1/2 cups of sugar
  • 1/2 cup of butter (melted).

Oven temp: 350 Cook time: 30-35 m OR until golden brown and set in the center

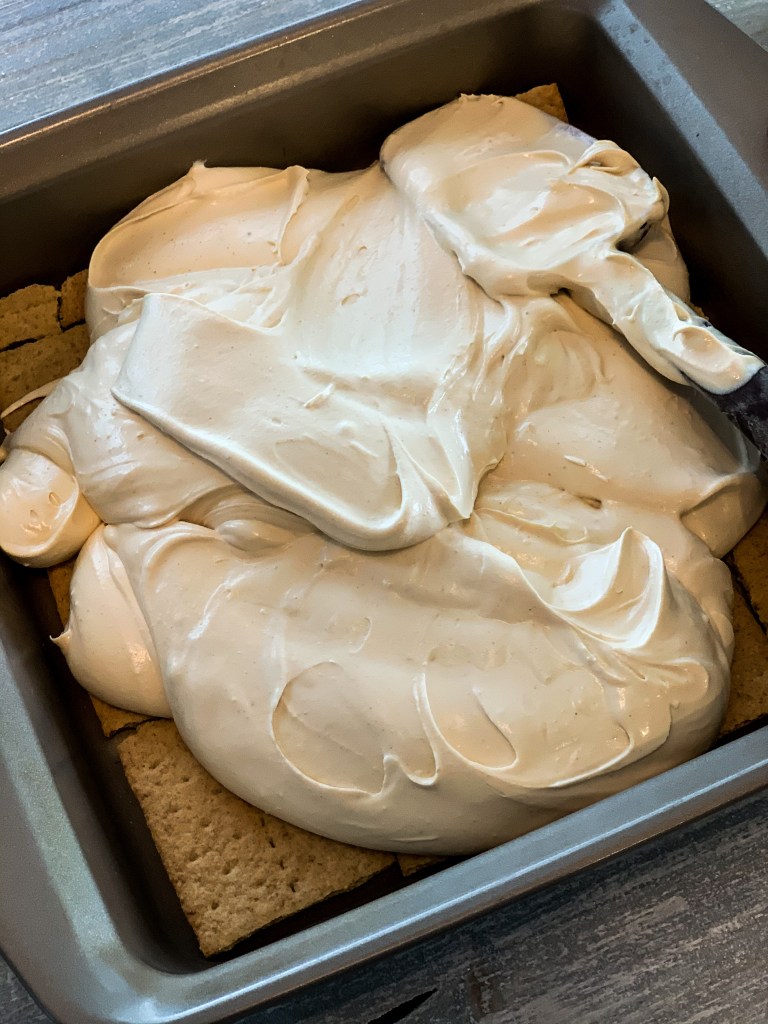
  1. Press 1 can of crescent rolls into a greased 13 x 9-inch pan
  2. *Make sure to press any tears or perforations together to get an even bottom layer
  3. Beat cream cheese and 1 cup of sugar together until smooth
  4. Add vanilla extract
  5. Spread cream cheese mixture across crescent roll layer
  6. Top with the second can of crescent rolls (again, pinching or pressing closed any tears or perforations).
  7. Stir together melted butter, remaining sugar, and cinnamon. Spoon on the top layer of crescent rolls.
  8. Bake, Eat, Refrigerate, Reheat (microwave for 5-10 sec at 50% per) but literally… they’re just as fantastic cold.
  9. *Note: these took closer to 40 minutes in my oven, so just keep an eye on the time, the color of the crust, and the jigglyness of the center.
P.S- Serving size is 12 NOT 2.
  • Macros are:
    • 449 calories
    • 25g fat
    • 41g carbs
    • 4g protein

I hope you get to sit down, enjoy a fantastic, flavorful meal, a light and crisp margarita, and a slice of Sopapilla Cheesecake Pie!

-C

Advertisement

Don’t Hold The Dressing

Have you ever entered a restaurant, ordered a salad without the dressing, then munched unsatisfyingly on crap lettuce… only to find yourself reaching for a cookie 30 minutes later?
Have you ever skipped the dressing because it would make eating a salad “pointless” or because you were worried you would be judged?

WELL, I just want to tell you right now:
YOU CAN HAVE THE DRESSING?

Whether the dressing you’re considering is dairy-based, oil-based, or vegetable-based… you CAN enjoy it and still make a healthy decision.
P.s- If someone judges you for adding dressing on your salad… don’t eat meals with them, they’re a jerk.

The important thing when choosing a dressing is that it fits your meal/appetite and that you eat the APPROPRIATE serving size.
Now, just to be clear: THE WHOLE BOTTLE OF RANCH IS NOT AN APPROPRIATE SERVING SIZE.
This can be a little challenging if you’re out to eat so the best way to tackle that is to ask for your dressing on the side. It will take a little extra leg work to mix your salad, but it will help you with portion control.

Next, I’m going to generalize dressings (and sauces) into three categories:

  1. Dairy-Based- Alfredo sauce, Ranch, Blue Cheese, Butter sauce, Mayo-based, etc.
  2. Oil Based- Vinaigrettes
  3. Other- Condiment Based dressings: Mustard, Bbq sauce, Salsa, Tomato Sauce, etc.

*With categories 1 & 2, the primary concern for most individuals here would be either high-fat content (if you track macros) or the high calories for a single serving.

*With category 3 dressings/sauces will likely be low calorie but may be high in sodium (if you track that kind of thing).

Now that we’ve broken that down, I want to analyze the reasons most people reach for dressings.

  1. Their food may be dry or bland (or they just eat it for every meal every day and need something to “switch” it up).
  2. They don’t enjoy the item they’re eating (usually veggies here, let’s be real).
  3. It’s standard to add dressing or sauce to salad, pasta, chicken parm, you name it, AND you don’t really need an “excuse.”

And here’s why (in my opinion) we shouldn’t HOLD the dressing if that’s what we want.

  1. You may be more willing to eat nutrients your body needs. For example, maybe your child won’t eat carrots without ranch. Is it really a “hard no” just because Ranch is high in fat… or is it worth it to give him/her a little so they’ll eat some GOOD FOR YOU foods?
  2. Nobody wants to eat plain, bland, or repetitive meals. Now, you could always add seasonings to make the meals a little different, but pouring a little oil or dressing over your chicken breast isn’t likely to kill you ASSUMING you practice moderation and proper serving sizes.
  3. Sometimes it is just good for your mind to eat food that’s a little higher in calories or that you know isn’t a “diet food.” You won’t gain weight from eating 2 TBSP of Ranch dressing or 1/4c of Alfredo sauce once a week. AND if you do… it would likely be because you’re not actually in a caloric deficit.

BUT, the cool thing about dressing and sauces is that in addition to the traditional items we’re used to, there are also tons of lighter and healthier alternatives out there!


I’ll link a few articles and recipes if you’re looking to make your own dressings and sauces but for those of you needing some store-bought options, look no further:

  • Bolthouse Dressings– They’re yogurt-based (I swear they’re the best yogurt-based dressings I’ve had), making them lower in fat and calories. We’re talking less than 50 calories for one serving. I keep four bottles of this brand in my fridge at all times.
  • Oils– There are many different options here in the oil market, but essentially, get what you like or what fits your nutrition plan. I personally prefer an olive oil/canola oil mixture and add balsamic vinegar to that with a few seasonings to make a homemade dressing.
  • Panda Express sauces– If you’re sick of rice, green beans, and chicken, drop a little bit of these sauces (you can find them in the noodle aisle, I believe) if you want to “spice” your meal up. *These are heavily processed, so if you’re looking for an item that you can name all of the ingredients, keep walking by this one.
  • Salsa– This is such an incredible option to add variety to your meals because it’s low in calories (although some can be high in sodium), and there are hundreds of different variations.
  • Pasta sauce: I’ve made my own before using a recipe from MEAL LIME, but it was even better when I added a store-bought pasta sauce that had a lot of veggies to it. My tip here would be to avoid a cheesy sauce unless that is what you’re going for. I love grabbing ‘Mom and Pop’ brands from our local grocery stores. These are usually on the top shelf (in my experience). Otherwise, watch the sodium content and grab whatever flavor/brand strikes your fancy.
  • Greek Yogurt-I spoke earlier about Bolthouse dressing, but I want to talk “in general” about dairy based dressings or sauces. When I’m looking for a healthier option for a dairy-based dressing or sauce, I almost ALWAYS use greek yogurt. It has a similar consistency, higher protein, more probiotics, and is equally as “bitter.” This is an awesome (and a quick way) to make your own dressings or sauces and cut down on the “junk.” This can also make high-calorie items – low calorie. * It’s the perfect substitute for sour cream btw.
  • Honey/Syrup– I didn’t plan to write about this one, but I know sometimes a dressing or sauce can be for a sweet dish. Just remember, honey is a GREAT tool and is low on the glycemic index (but still high in calories). There are also several low calorie (and even no-calorie) syrups out there… it just depends on your preferred level of processing.
  • Apple Butter– Do yourself a favor and check out last week’s blog and whip up some of that. You’ll find yourself adding it to everything. It’s low calorie (although you’re in control of that), sweet, and delicious.
  • And lastly, a condiment I just recently discovered: Honey Mustard. NO… not the dressing (that would be a calorie killer), but honey MUSTARD. Mustard is about as low (or no) calorie as condiments get, and I’ve recently discovered that honey mustard is EVEN BETTER. Still zero calorie (don’t ask me how maybe it’s magic), but it’s good on just about anything you’re looking to spice up (plain chicken and veggies, veggies, and rice, a burger, a sandwich, snacks, eggs)… TRY IT!

Now that you’re probably hungry, I’ll remind you about the tips I have for making dressing/sauce choices:

  • Go lighter when you can/when you want to.
  • Get your dressing on the side!
  • Make your own at home 🙂
  • Buy mom & pop type sauces
  • Snag some yogurt-based dressing (OR mix some of your dairy dressing of choice with greek yogurt and little water!
  • MUSTARD.

And if you’re ready to try your hand at homemade dressings/sauces, here are a few that I think could be fun!

  1. https://cookieandkate.com/healthy-honey-mustard-dressing-recipe/
  2. https://pinchmegood.com/4-easy-healthy-salad-dressing-recipes-you-need-to-try/
  3. Wow: I’m making this ASAP
    https://littlebitsof.com/2016/09/easy-healthy-five-minute-sauces/
  4. https://www.bonappetit.com/gallery/healthy-sauce-recipes

If you try here or have your own dressing/sauce recipes, let me know what you LOVE.
-C

Spring Apple Butter

We may be a little past the FALL season, but that doesn’t mean your home is APPLE free.

I don’t know if it’s just me, but I have a habit of buying apples for the entire week with every intention of eating them… but by Wednesday of the NEXT WEEK, I’ve still got the same amount of now nearly bad and a little bruised apples that I purchased during my last grocery haul.

I had 4 apples left this week, so I tossed them in the Instant Pot and made some Honey-Apple Butter. I wanted to share this super quick (easy and flexible) trick for homemade apple butter. The remarkable thing is that you can make this work with ANY amount of apples or any type of sugar.

What I used:

  • 4 apples: washed, cored and quartered
  • Cinnamon: Eyeball it or drop in 2 sticks
  • *You could add nutmeg to this as well (I’d start with 1/2 tsp)
  • Vanilla: 1 stick but you can sub for 1tbsp of extract
  • Water: 1/2c
  • Honey: 1/3c
  • Light Brown Sugar: 1/4c
  • *Not in this batch but an excellent way to sweeten the butter.

Instructions:

Add your apples, cinnamon, nutmeg vanilla, sugar, and water to your Instant pot and set on High Pressure for 5 minutes. Once done, let the pressure cooker self-release.

After they’re cooked, blend your apples in either a blender or food processor and add in your honey (if you chose to use it). Once your apples and honey are blended, you have two cooking options:

Your Instant Pot (Using the sauté feature)

A standard pot on Low heat

Either way, you’ll probably want to have a splash shield or lid ready.

Transfer your mixture to your pot of choice and bring to a low boil/simmer to thicken and darken until you’ve reached your desired consistency and color. If you have trouble with your apple butter thickening, you can also bring it to high heat for 2-3 minutes (assuming you’re utilizing a traditional pot), then lower back down to a simmer. Also, be sure to stir frequently.

Since my first time making this, it’s been a staple in our home. We use it on sweet potatoes, pancakes, waffles, with graham crackers, and on sandwiches. It’s pretty much a fan favorite around here and keeps us from wasting produce!

I hope you get the chance to make this, and I can’t wait to hear all about it!

-C

Peanut Butter: No bake “cheese”cake

I’m going to keep this short and sweet… kind of like the prep time and flavor of this dessert.

If you’re looking to make a quick treat with items that you likely already have… Look no further.
This dessert takes 5 minutes (plus refrigerating/freezing time) but the luxury of this recipe is, everything is UP TO YOU.
Toppings: Up to you
Density: Up to you
Temperature: UP to you
Flavor: Up to you.

But for the sake of the instructions: I’ll tell you what I made this time.

  • 1 Sleeve of Honey Graham Crackers
  • 1.5 cups of Macadamia Nut Peanut Butter
  • 1 (9-12oz) Cool Whip
  • 1 (6-8oz) package of cream cheese
  • Honey (drizzle)
  • Chocolate Syrup (drizzle)

Simply break apart the graham cracker to fit the pan that you’re using (I used a 9×9). *You can blend them and make a real crust but I’m low maintenance.

Mix together the remaining ingredients (with the exception of the honey and chocolate syrup). *NOTE: If you’d like a thicker “pie” filling, use the entire 8oz of cream cheese. If you’d like a fluffier (more whipped) pie (which is what I prefer but not what’s pictures), use less cream cheese (I’d even consider going as low as 4 oz and doubling the cool whip). But the neat thing here is that everything is up to you and you can completely customize this dessert to your craving.

After you’ve spread the cheesecake mixture on the crust, you can freeze or refrigerate it. If you used more whipped cream, I’d recommend freezing for at least 1 hour.

You can also swap out the peanut butter with Nutella, or pie filling. It’s very similar to the recipe I’ve previously posted about “faux cheesecake”.
And a few things I’ll be switching when I make this is again is I’ll be doubling the cool whip, reducing the cream cheese, and adding pudding to it.

If this inspires you to go throw together a makeshift “cheesecake”, let me know what you made yours with!

-C

Completing our MACRONUTRIENT SERIES: Protein

To complete our MACROnutrient series, today we’re going to talk about PROTEIN.

Things we’ve heard about protein:

  • We need 1g of protein for every LB you pay (Myth).
  • You need supplements to “build muscle” or lose weight (Myth).
  • You have to eat protein with every meal and snack (Myth).
  • You can’t gain weight or body fat (Myth).

Facts:

  • You “need” .8-1g of protein per kg, which is actually 2.2 lbs. If you’re an athlete, you’ll likely want to consume between 1.2-2g per 2.2 lbs to help build muscle and aid in recovery.
  • You don’t need supplements to build muscle OR lose weight.

To be clear, supplements can be a convenient (but expensive) source of protein, but it’s definitely a luxury item. Food BEFORE supplements. While I recommend focusing on whole foods, if you need supplements to hit your protein goals, go for it but do your research.

*Some of my favorites protein sups are Legion protein and Built Bars (the Coconut Almond is my absolute favorite).

**P.s-Supplements AREN’T regulated by the FDA.

As long as you’re hitting your protein goal and you aren’t experiencing any issues with digestion or appetite, you don’t need to eat protein at every meal or snack. HOWEVER, eating well-balanced meals can help with digestion and fatigue.

  • You CAN gain weight by overeating even if it’s protein! In addition to factors such as water retention, excessive bloating, and digestion issues… if you’re eating over your TDEE (Total Daily Energy Expenditure), you will gain weight REGARDLESS of which macronutrient puts you “over.”

Additionally, protein is the only macronutrient that your body isn’t capable of reserving. Both fat and carbs can be stored for later use (aka: energy reserves), but protein can’t. Either it helps build and repair tissue and bone, or it doesn’t.

Some everyday protein staples are:

  • Chicken
    • Breasts are low in fat
    • Thighs are higher in fat but are more forgiving when reheated
  • Turkey
    • They’re kind of high in fat… they have about 8g per serving.
  • Beef
    • Comes in several different ratios of fat.
    • It’s more flavorful and reheats better than turkey.
  • Pork
    • Flavorful (I mean.. have you heard of bacon?)
    • High in fat
  • Fish/Shellfish
    • Low in calories/High in protein
    • EXCEPT for Salmon. Salmon is high in fat (therefor high in calories).
  • Greek Yogurt
    • Has full fat/low fat options
    • Can be high in sugar
  • Cottage cheese
    • Has full fat/low fat options

There are also several protein options that are meat free and even vegan.

  • Lentils/Quinoa (Plus it’s high in fiber)
  • Milk
  • Tofu
  • Seitan
  • Tempeh
  • Edamame
  • Chia seeds
  • Nuts

Whats your favorite protein?

Sweet Potato Waffles

If you follow me on social media, then you knew this day was coming…

Today I’m going to share with you my sweet potato waffle recipe from last weekend.
My tiny human and I had an incredible time making these and they were a hit in the flavor department. 

These waffles are great because they’re:

  • Low in calories!
  • High in Vitamin A (123% DV)
  • High in Vitamin C (132% DV)
  • AND honestly, they’re just delicious.

I made this recipe twice, testing the amount of liquid and the waffle iron temperature. If you’d like your waffles a TINY bit crispier, cut the amount of milk to 1/3 cup. Also, I recommend no higher than a temperature of 4 unless you’re going to put the waffles out early. 

You’ll need: 

  • 2/3c mashed sweet potato (cooked)
  • 1/3c light brown sugar 
  • 1.5 tsp baking powder 
  • 1.5-2 tsp cinnamon 
  • 1 tsp vanilla
  • 3 large eggs 
  • 1/2 cup flour
  • 1/2 cup milk 

While the waffle maker is preheating, mix the ingredients together (I recommend mixing the first 6 ingredients well, then adding the flour and milk and mixing again).  

A few good toping options are: 

  • Nuts
  • Yogurt
  • Fruit
  • Whipped cream
  • Cream cheese

However, the G family found that our favorite is homemade honey-apple butter. ***If that sounds good to you, stay tuned because I’ll be coming up with a macro friendly recipe soon.*** 

  • Calories: 169
  • Carbs: 24g
  • Fat: 5g
  • Protein:7g
  • *Macros are for 1/3c milk!

Let me know what you think by commenting or emailing me at nutritionwcrystall@yahoo.com

Sugar Spun Run Biscuits!

This weekend the tiny human and I made homemade biscuits for biscuits and gravy and I promised everyone an update on how they turned out.

Well, they turned out well, were a hit in the our house and so much fun to make. One of us really loved cutting the biscuits so much that we made a baker’s dozen. 

A few of our biscuits came out a little on the thin side but we were in luck because Isaac likes them that way! 

This recipe was quick and easy to make and only requires 6 ingredients that you PROBABLY already have in your pantry.

And best of all…. No ROLLING Required

The recipe we followed was from a blog called Sugar Spun Run.

The writer, Sam, has some other really fantastic recipes so if you’re looking to spend some of your quarantine time baking, head over to Sugar Spun Run! https://sugarspunrun.com/easy-homemade-biscuits/#wprm-recipe-container-13245

Be sure to check in with me and tell me what you made! 

-C

Eating w/ an Illness (Cold/Flu)

Hey there! This content was initially only shared on the CrumbswithCrystall Instagram but with everything going on right now, I wanted to share it to the blog as well. 

Until very recently, my tiny human and I have been sick a lot since we moved to Kansas in December. Usually, when I’m sick, I’m a comfort food fiend. I tend to eat whatever I want, in whatever amount I want… which is typically a lot because my appetite doubles when I’m sick. However, this last bout of ‘bug’ was quite different. 

For the first time in my adult life, I didn’t WANT to eat. Knowing that my body needed nutrients not only for fuel and strength but also for recovery, I chose nutrient-dense foods. I immediately noticed I was more satisfied despite feeling physically miserable. I also noticed that my choices had an impact on inflammation, bloating, and water retention, which can get out of hand when your body is fighting off an illness.

This time I ended up surviving off of my favorite protein shakes, crackers, soup, fruit, and a handful of chocolate-covered cranberries. That might not sound like the most fun or even nutritious diet in the world but if you’re curious why SOME of the things I ate helped me, scroll on down.

Here are some recommendations (and reasons why) for eating while you’re sick with cold/flu like symptoms. 

*I may cover nutrition for other illnesses in the future.

Soup- it’s excellent for hydration and sodium replenishment.

Electrolyte drinks- they promote proper balance between water, glucose, and sodium in the body. If you’re not eating much or can’t keep food down, you likely need one of these to help keep you from depletion (if you can stomach one).

Herbal tea- I’d shoot for decaf here, but there’s a lot of reasons to drink some tea:

It soothes the throat, eases congestion (especially when it’s warm), and it has natural bacteria-fighting capabilities.

*Also, adding honey can help coat your throat and ease discomfort.

Citrus- is good for more than just vitamin C! While vitamin C can reduce the severity of your cold or flu symptoms, eating fruits like grapefruit, limes, lemons, and oranges are beneficial because they all have immunity booster properties.

*Also, try bell peppers and strawberries.

Leafy greens- eat ‘em. You know why.

Eggs- they’re an excellent source for protein (which you’re probably running low on diet-wise when you’re sick). They also provide zinc, which can help with the duration of your cold (but ONLY if you take/consume zinc before coming down with according to several studies).

Yogurt- this one is controversial. Yogurt COULD thicken mucus (it’s been proven but only in some cases), but it also provides probiotics and replenishes gut bacteria. Gut health is closely linked to hormone balance, so illnesses impacting your diet could cause additional symptoms.

Sweet potatoes- they guys provide vitamin A which amount other things, plays a critical role in inflammation, and enhances your immune system. They’re also a great source of glucose 🙂 And they’re a “bland” food, so you shouldn’t have too much trouble consuming these if you’re feeling a little nauseous.

If you’ve been sick lately and found something really helped you… let me know what it is! I’d love to try it next time!

-C

Quarantine Dieting

Can you maintain a healthy diet while QUARANTINING?

I sincerely hope that this post finds all of you well and that you continue to remain so throughout the remainder of this epidemic.

Despite the Coronavirus and potential quarantines, some of us may be looking for healthy ways to survive instead of eating our weight in junk food and Ramen for 2+ weeks or months.

*Disclaimer: 1. If your grocery stores are sold out of fresh foods, it’s inherent that you’re going to eat some “less than healthy” foods. 2. If you’re already in quarantine, ill, or immunocompromised and can’t grocery shop or get groceries delivered to your door, by all means… EAT WHATCHA GOT.

BUT, if you’re looking for healthy suggestions to snag at the grocery store, Keep Reading.

I gotcha.

  • FRESH fruits and veggies:
    • Canned and frozen are better than none, but nothing can match the nutrient value of fresh produce.
    • I find berries, apples, lil’ cuties, and broccoli are devoured the quickest in my home. They’re nutrient-dense, versatile for recipes, and make a great snack.
    • Applesauce and smoothies are great options as well.
    • Don’t forget to grab some lemons as well to keep your water exciting.
  • QUALITY proteins:
    • Quality protein options for my family look like frozen salmon, eggs, rotisserie chicken, beans, nut butter, trail mix, and our favorite protein bars.
    • Keeping quality proteins on hand will help you manage your hunger while also assisting the body in creating ANTIBODIES!!! 
    • It will also help repair your muscles after you absolutely wreck those at-home workouts you’re hopefully doing.
  • DRINKS:
    • Tap or bottled, it doesn’t really matter, but GET YOUR WATER IN.
    • Electrolyte drinks can also be helpful during this time, so grab those but keep an eye on the calories, carbs, and added sugars.
  • SOUP:
    • When you’re sick, it’s essential to stay hydrated, which can be a chore when your appetite is low.
    • Keeping soup in the house can come in handy if you do become sick, lose your appetite, or just don’t feel like making a four-course meal.
  • COMPLEX Carbs:
    • Grabbing some non-perishable carbs are pretty important when preparing for quarantine. 
    • Some carbs currently in my pantry are rice, pasta, oats, sweet potatoes, spaghetti squash, crackers, and popcorn.
    • If you remember from my previous spotlight post on carbohydrates, they’re the most essential nutrient for your brain and nervous system and provide 1/2 of the fuel utilized by your muscles.
    • Chips and cookies also fall into this category. And if you’ve got girls scout cookies in the pantry (like me)… DON’T EAT THE ALL IN ONE DAY. Eat a few and walk away. You may call it self control, but I’m calling it rationing!
  • Dairy/Oils:
    • Hard cheeses like parmesan last longer and can add flavor to your meals.
    •  Milk can be a tough one when facing a quarantine, but if you’re worried about shelf-life, you can grab powdered or boxed milk.
    • Don’t forget to snag some healthy oils like canola, avocado, and olive oil to help add flavor, calories, and fat to your meals. They’ll help with satiety because of that.
  • REALISTIC INGREDIENTS:
    • This may seem like common sense, but I’ve been on diets of blindly shopping through the grocery store before where I purchased food that I knew there was a 90% chance I wouldn’t eat. Don’t waste your money! If you’re planning to buy ingredients that you believe you “need” because you’re going into quarantine…. but you know you’re unlikely to make a meal out of it, DON’T BUY IT. Someone else may actually need or want that item, and it’s just going to collect dust in your pantry. Instead, be sure to buy ingredients you’ll actually work with and use.

I understand this is a scary time (for some right now more than others), and my heart goes out to all of you. If you CAN, let’s use this time to focus on HEALTH. We will get through this, and your body will be thanking you for all your efforts.

If you have any questions, comments, or concerns or if there is ANYTHING I can do or ANY topic I can cover during the next few weeks, please leave a comment or email me at nutritionwcrystall@yahoo.com

Meal Prepping TIPS & TRICKS

I know from experience that meal planning, prepping, and executing can be extremely challenging while juggling responsibilities, curveballs, and the lack of 30 hours in a day.
So, I’m bringing to you my 10 (+) tips for meal prepping. There are a few tips that involve purchases, but don’t worry; they’re not necessary (but man, they’re fantastic). *Disclaimer: I’m going to get the “purchase” items out of the way… if you aren’t looking to spend any money, skip to step 4.

  1. Meal PLAN: This can be incredibly stressful but so efficient (for shopping and cooking). If you plan efficiently, you avoid purchasing ingredients that you don’t need, just for them to sit and rot in your fridge or collect dust in your pantry. If you plan correctly, you can even help yourself cook in bulk, eliminating some stress and time on prep-day. One way I’ve been doing this lately is by using this EPIC cookbook: Cook Once, Eat All Week by Cassy Joy Garcia. This book is super “diet” flexible, and everything so far has been amazing! https://www.amazon.com/Cook-Once-Eat-All-Week/dp/1628603437
  2. If you don’t own an INSTANT POT… go to the store (or Amazon) RIGHT NOW. Seriously… why are you still sitting there? Now, you may be one of those individuals who think, “I have a crockpot already. I don’t need to spend $80-100 on another gadget that does the same thing”… but YOU DO (I mean you don’t… but you do). The Instant pot makes cooking chicken, chili, and rice happen in MINUTES, and it’s always cooked perfectly! No more crunch rice or dry chicken! https://www.amazon.com/Instant-Pot-Programmable-Pressure-Steamer/dp/B01B1VC13K/ref=sr_1_1?keywords=instant+pot+8+ct&qid=1581643310&s=home-garden&sr=1-1
  3. Use a good lunchbox. It’s important to keep your food at the right temperature, and where you work or spend your day may not be near a fridge. I use the ISOBAG and have for years. The icepacks are literally the BEST I’ve ever used, but if you have a lunchbox you prefer, that works too. https://www.amazon.com/Meal-Prep-Bag-Kit-Containers/dp/B00M8ID2NE/ref=sr_1_4?keywords=isobag&qid=1581643467&sr=8-4
  4. Don’t SKIP breakfast. I can already hear the breakfast-haters screaming at me but hold on. It doesn’t matter to me what time you eat breakfast… but PREP it. If you enjoy a good breakfast but don’t think you can do better than the instant oatmeal or frozen breakfast sandwich, you’re wrong. There are tons of great breakfast options to keep you feeling full and give you some energy like overnight oats, breakfast bowls (scrambled eggs, sausage, and potatoes or rice), breakfast muffins/casseroles, protein pancakes, smoothies, etc. I usually prep my breakfast for 2 or 3 days on prep day and then prep again later in the week.
  5. Know when to cut corners. This can be challenging and can definitely get expensive if you’re making a lot of convenience purchases. When I’m pressed for time (or just lazy), my go-to’s are rotisserie chicken, pre-marinated seasoned proteins, precut veggies, and proportioned snacks.
  6. Work ahead on Prep-day! Like I mentioned above, I cook breakfasts and my proteins 2-3x a week. But, you can still prep foods that you’re not cooking right away. Take the time on prep day to precut any veggies or fruits you’ll use during cooking or eating later in the week.
  7. Even though I prep my meals, I get burnt out on eating reheated food for all of my meals. To avoid this, I like to cook a fresh dinner 3x a week. In order to do this after working, mommying, and adulting… I keep dinner prep to 30 minutes of unsupervised cooking. It means we all get to eat a hot meal together, we have leftovers for lunches, and I can multitask while dinner is cooking.
  8. Don’t eat the same thing all week. Burn out is real. If you eat the same foods all week, you’re missing out on vital vitamins and minerals you get when you eat a variety of foods. Also, if you’re anything like me, that makes me less excited to eat and also less satisfied.
  9. Prep what you WILL eat. If you’re not going to eat reheated tilapia and rice at 1130 am in your work break room- don’t prep it. Prepping foods you won’t eat because you know they’re “healthy” and that you “should eat them to X, Y, or Z” then you’re only wasting your time and money. And in case you need a reminder: YOU CAN NOT GET YOUR TIME BACK.
  10. Pack MORE than enough! You never know when an 8-hour workday might turn into 9, 10, or even 12 hours. Pack an extra snack just in case you’re stuck in traffic or at work. You can’t plan for life curveballs, but you can prepare.
  11. Pack a treat 🙂 I feel so much happier with my “diet” throughout the day when I have a small treat after my lunch. A tiny Hershey’s or almond joy will do the trick but find that one treat that you love and bring a serving of that with you.
    And lastly:
  12. Supplement where you NEED to. Now, I’m not going to break out the supplement soapbox, but it’s important to keep an eye on areas in your diet that you might be missing the mark on. For me (and for most people, that’s protein). Two of my all-time favorite protein supplements are BUILT Bars and Core Power Protein Milkshakes. These both taste incredible and help me hit my protein while keeping my sweet tooth satisfied.
    I’m ALL about helping others (and myself), so if you have ANY tips you’d like to share… OR any favorite recipes, feel free to comment or send them to my email address at nutritionwcrystall@yahoo.com